How To Use Cricut Infusible Ink Transfer Sheets?
Have you tried Cricut’s new Infusible Ink products yet? Cricut Infusible Ink has two products: markers/pens and transfer sheets. The marker and pen are like regular Cricut pens, except you don’t draw directly on your project; instead, you draw on a copy paper sheet and use a heat press to press the ink from the paper onto your project. Transfer sheets are similar to sheets of heat transfer vinyl (HTV), where you cut out mirrored design and press with a heat press to transfer the ink from the transfer sheet to your project.
If you want to learn how to use Cricut Infusible Ink transfer sheets. This blog will guide you on what projects you can do with them, and with tips to use them. Cricut Infusible Ink Transfer Sheets are pre-printed sheets containing infusible ink created to work with the Cricut machine. You can load them into the Cricut machine like any other material, and the Cricut machine will cut out your designs.
Cricut Guide: How To Use Cricut Infusible Ink Transfer Sheets with Apparel Blanks?
In order to use Cricut Infusible Ink transfer sheets with apparel blanks, follow the steps given below:
What Supplies You Need:
- Cricut Machine
- Cricut Design Space, or the Cricut Joy app on your computer or phone device
- Cricut Heat Guide or Cricut Heat App (for Cricut Easy Press 3)
- StandardGrip Mat
- Cricut Easy Press 2, Cricut Easy Press 3, Cricut Easy Press, or Cricut Easy Press Mini
- Cricut Easy Press Mat
- Cricut Apparel Blank (Compatible with Infusible Ink)
- Cricut Infusible Ink Transfer Sheet
- Butcher Paper (2)
- Cardstock,
- Lint Roller
- Scissors
- Tweezers
Note: Before using infusible ink, ensure your hands are dry and free of any lotion or oil.
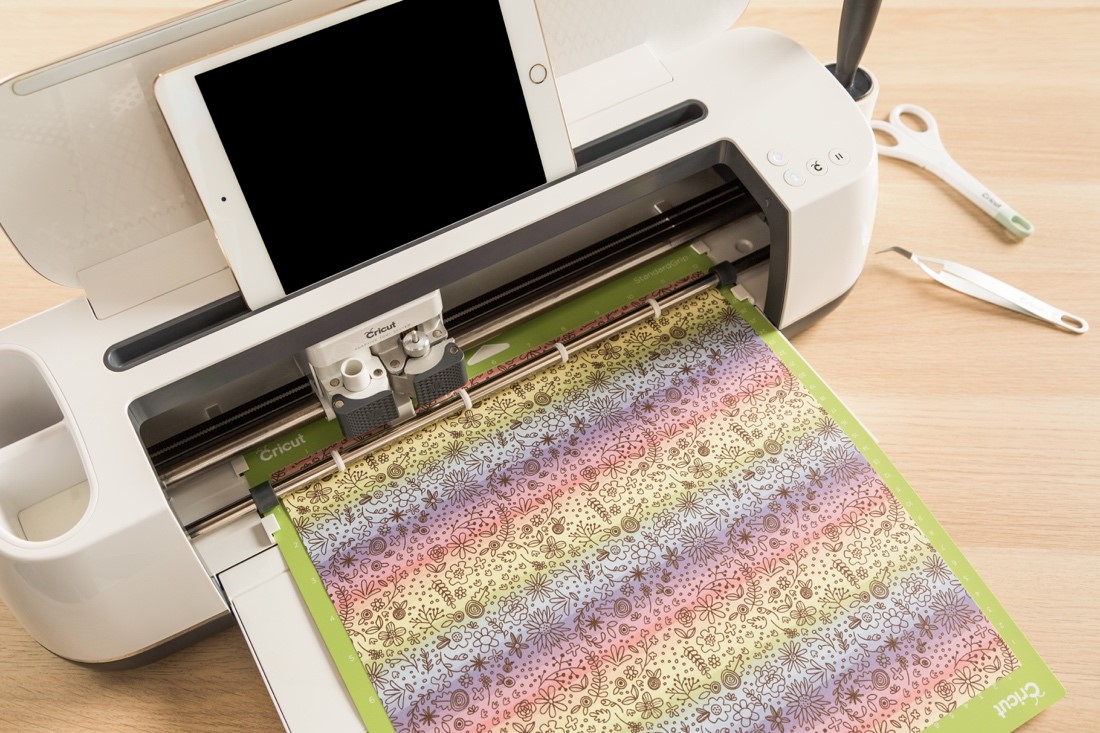
Step 1: Cut
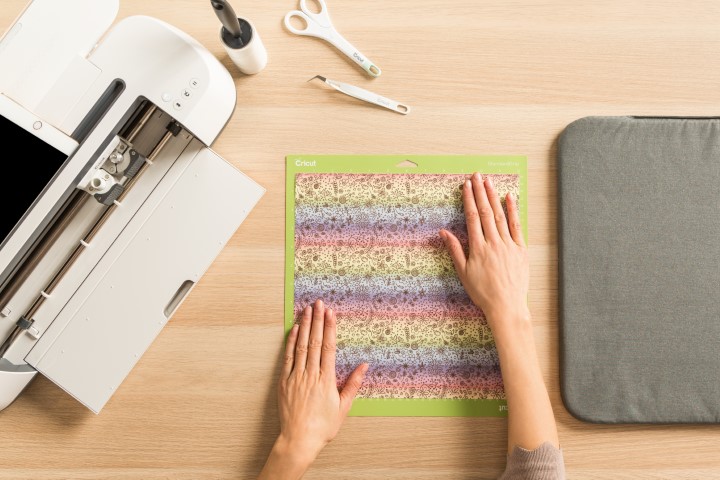
- First, put your Infusible Ink Transfer Sheet on the StandardGrip Mat, liner side.
- Choose and size your design in the software to fit the apparel blank. Make sure to mirror your design when using Cricut Design Space. The Cricut Joy app enables mirroring automatically when you choose your heat-transfer material.
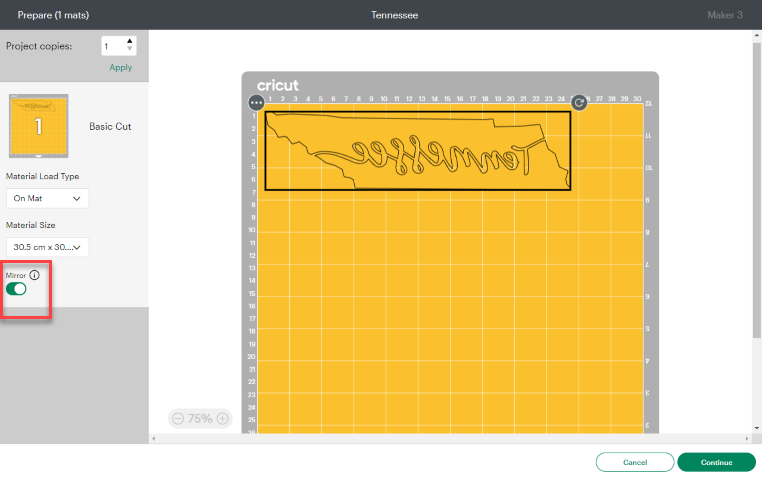
- Next, choose the Infusible Ink Transfer Sheet from your materials list. If you use a Cricut Explore, change the Smart Set dial to Custom.
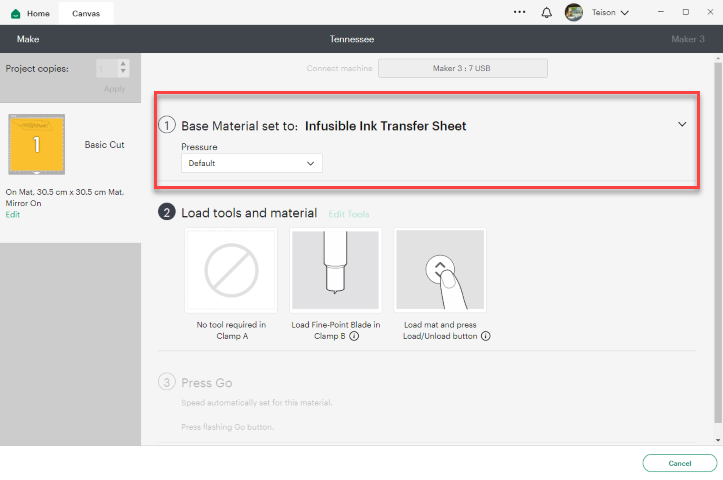
- After that, load the mat and blade into your Cricut machine, then click on Go.
Step 2: Weed
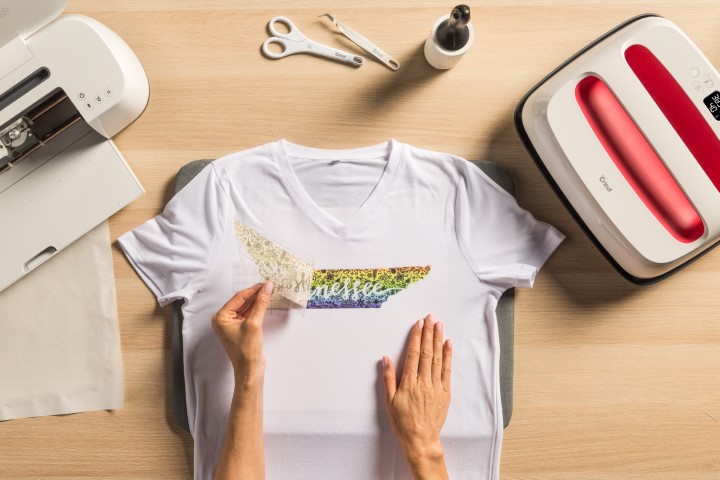
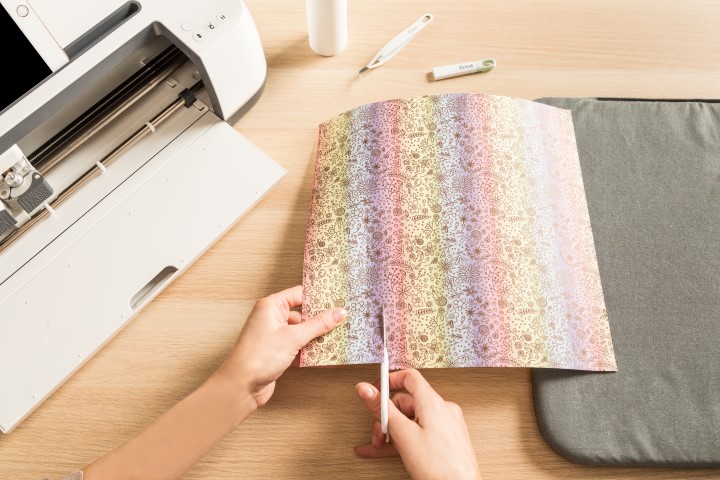
- Now, remove the cut design from your mat and trim away the unused area of the sheet.
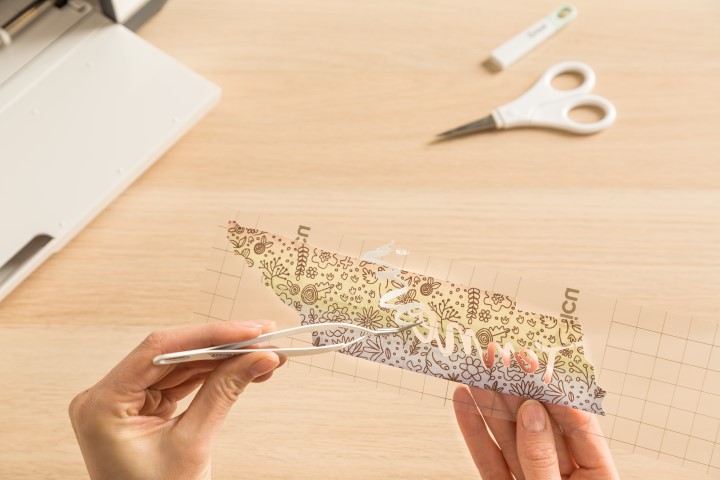
- Carefully roll the cut design, so the cut lines are distinct and more visible. “Cracking” the cut in this way (shown in the picture below) makes removing excess paper from in and around your design easier.

- Next, use your hand or tweezers to gently remove the negative pieces in and around your design, leaving the design on the liner.
- Then, trim the clear liner, so it doesn’t extend past the Cricut Easy Press heat plate.

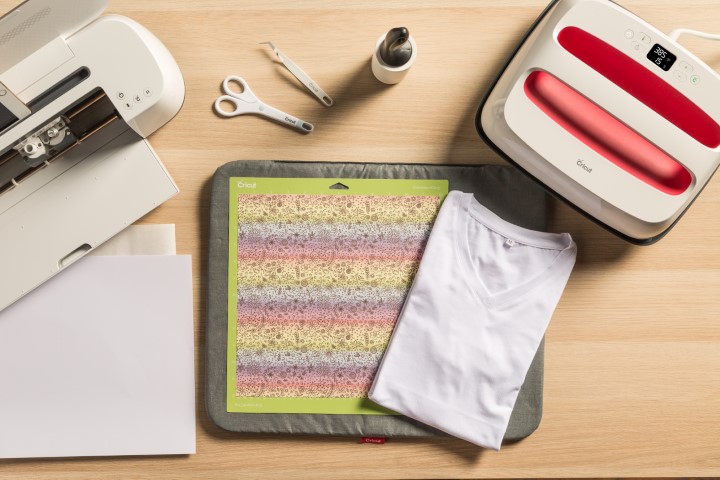
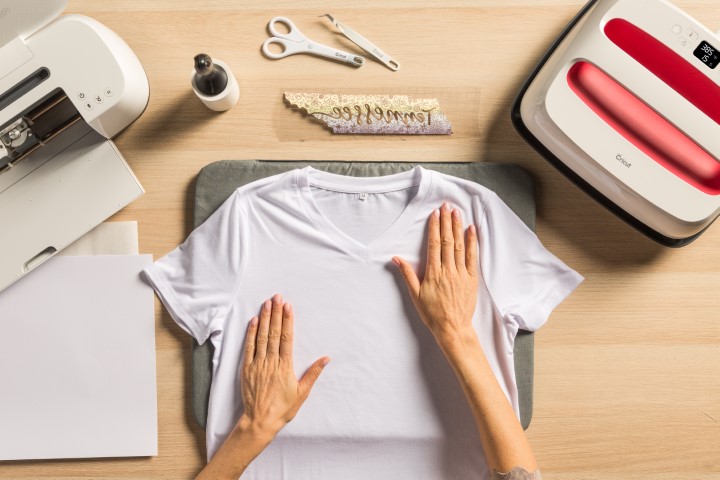
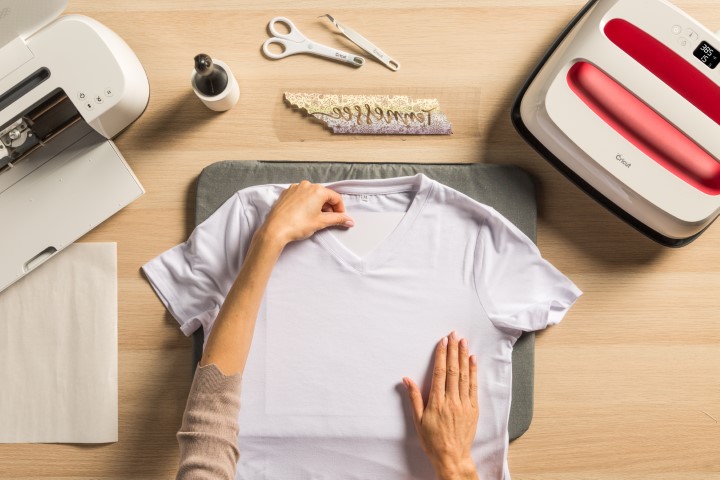
Step 3: Prepare Your Blank
- Lay the apparel blank over the Cricut Easy Press mat.
Tip: Now, this is a great time to get Cricut Easy Press ready. For your project’s exact temperature, time, and pressure settings, always guide to the Cricut Heat Guide or Cricut Heat App (for Cricut Easy Press 3).
- Now, place a cardstock sheet inside the apparel to protect your mat and project.
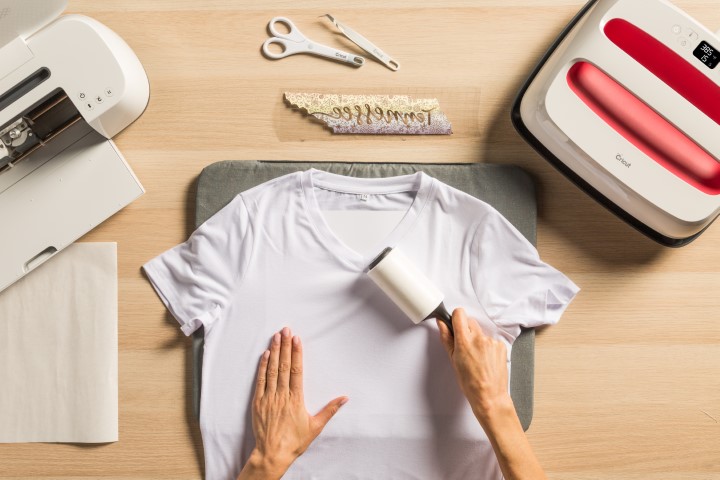
- Don’t skip this step: Use a fresh sticky to lint-roll your entire surface. Even minor debris or fibers can cause imperfections in the final transfer.
- Then, cover your apparel with butcher paper.
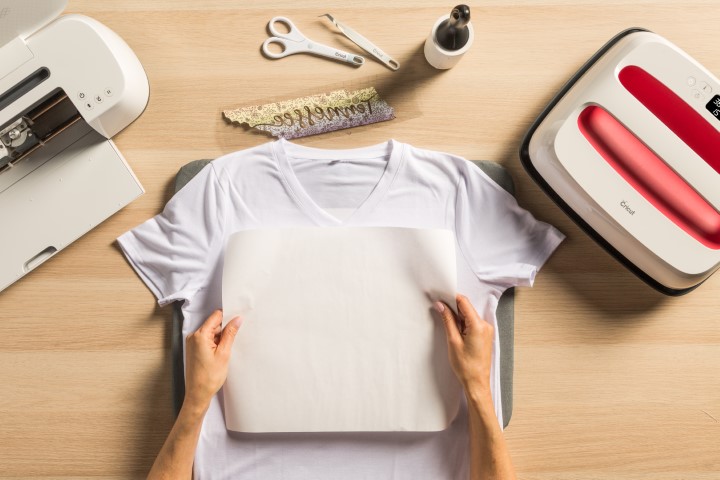
Note: The butcher’s paper should be larger than your Cricut Easy Press heat plate. Butcher paper has each package of Infusible Ink Transfer Sheets.
- Don’t skip this step—Preheat the application area to remove moisture and wrinkles that result from unwanted effects. See the Cricut Heat guide or Cricut Heat app (for Cricut Easy Press 3) for time and temperature settings – Use light pressure.
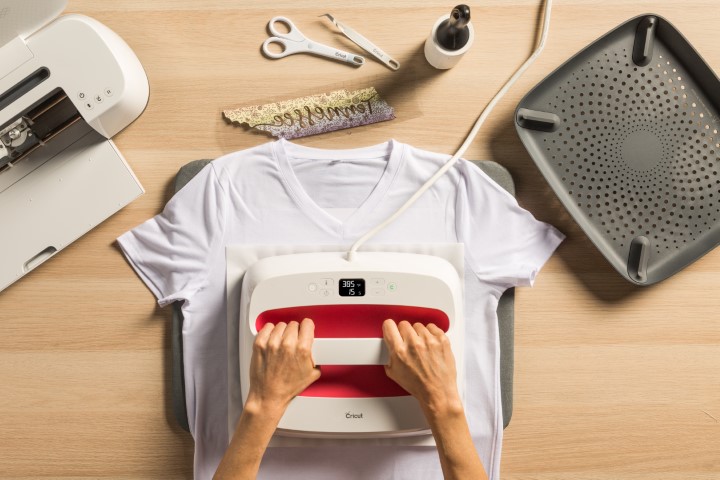
- Now, remove your butcher paper and allow the apparel to cool thoroughly.
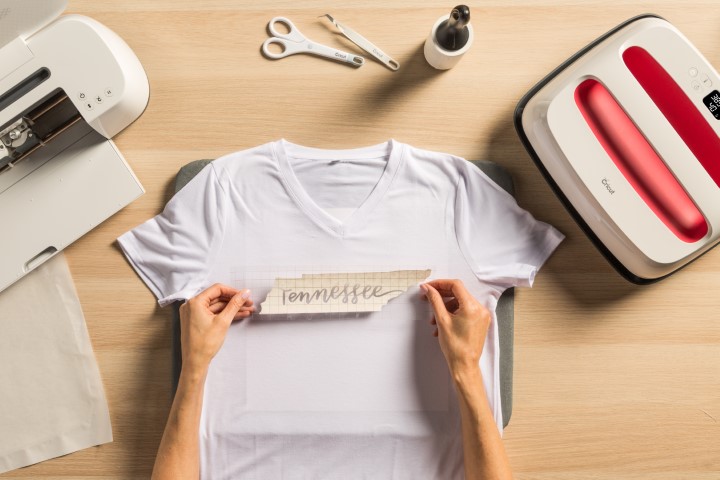
Step 4: Apply
- Put your cut design face down on the apparel and clear liner on top.
- Cover design with butcher paper larger than your Cricut Easy Press heat plate.
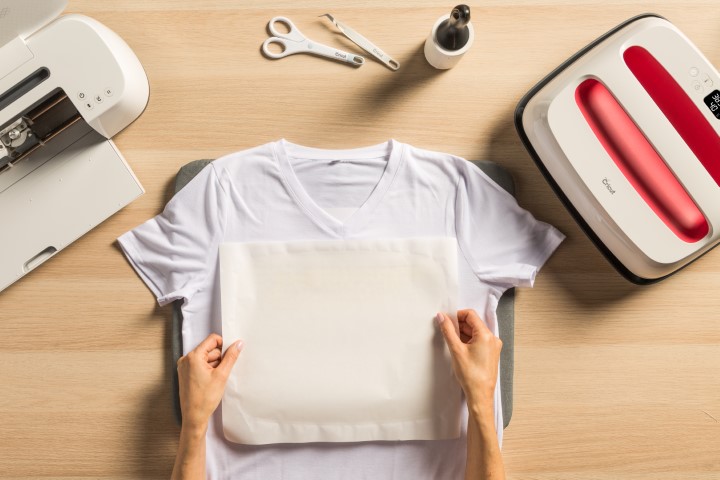
- Check out the Cricut Heat Guide or Cricut Heat App (for Cricut Easy Press 3) to find your project’s time and temperature settings.
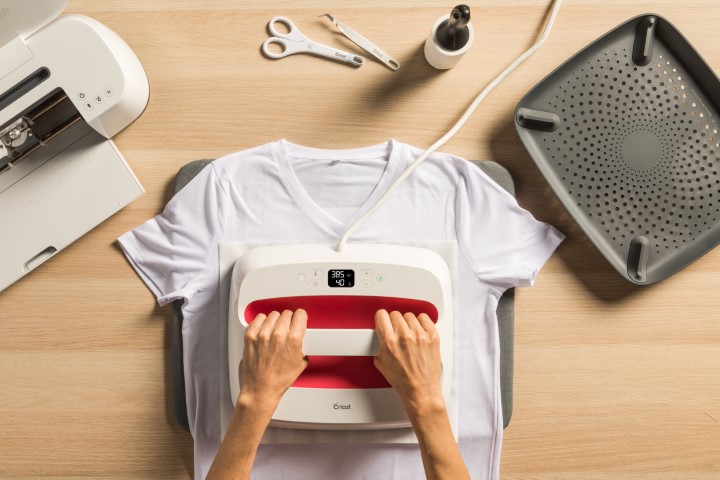
Important: Avoid seams when holding the Cricut Easy Press. If your heat plate passes over the seam, your design will not get the heat either, resulting in an unwanted transfer effect.
Important: Don’t slide or move your hands during transfer. Keep the stack as stable as possible while pressing. But, if using your Cricut Easy Press Mini, protect your design with heat-resistant tape. Press while applying and moving light pressure.
- When the beep is heard, slowly lift the press. Try not to move the pile, including your butcher paper.
- Let your project cool down. Once cool, slowly remove your butcher paper, then carefully remove the liner along with your design.
Important: If your design detaches from the liner and remains empty, remove it with tweezers. Please don’t remove it using your fingers. It can cause unwanted effects, such as ghosting or marbling.
Tip: Don’t reuse butcher paper for any other project.
- Now, enjoy......
Comments
Post a Comment